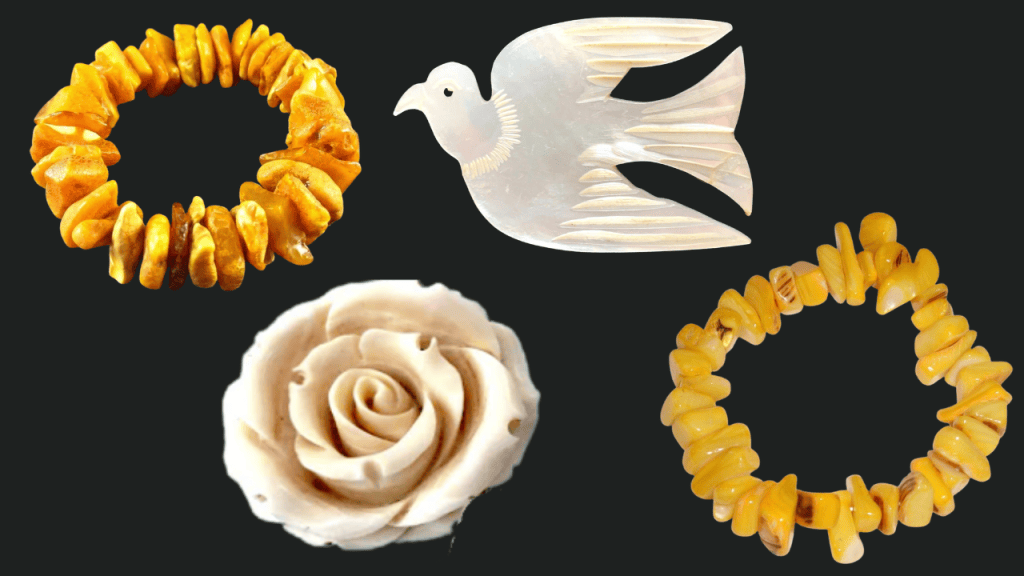
How to Identify Mystery Jewelry: Shell, Amber, Ivory & Mother of Pearl
Have you ever found a piece of jewelry that looks like it could be made from something valuable—but you just can’t figure out what it is?
I’ve been there more times than I can count.
When you’re buying jewelry at thrift stores, garage sales, estate sales, and other secondhand sources, you don’t always get a nice little tag telling you exactly what you’re looking at. Sometimes the material is obvious. Other times, you have to play detective.
Is that bead amber—or plastic?
Is that creamy white material shell, bone, or ivory?
Is that shimmering surface actually mother of pearl?
And sometimes, the answer isn’t what you initially expect.
That’s what makes identifying mystery jewelry so much fun.
In this guide, I’ll walk you through some of the materials that can be surprisingly difficult to identify, including shell, amber, mother of pearl, bone, and ivory, along with some of the things I look for when I’m researching jewelry for resale.
Why Jewelry Identification Matters When You're Reselling
Identifying the material in a piece of jewelry isn’t just about satisfying your curiosity.
It can make a big difference when you’re researching a piece for resale.
The material can affect:
- How you describe the jewelry
- Which keywords you use
- How you research comparable pieces
- What category you list it in
- How buyers perceive it
- Whether you can make certain claims about the piece
- And, ultimately, how you price it
But there’s an important rule I try to follow:
Don’t call something a particular material just because it looks like that material.
If I can’t confidently identify something, I’d rather describe what I can actually observe than make a claim I can’t support.
That’s especially important with materials such as ivory.
Mystery Material #1: Amber
Look at the Inside
One of the first things I look at is the internal appearance of the material.
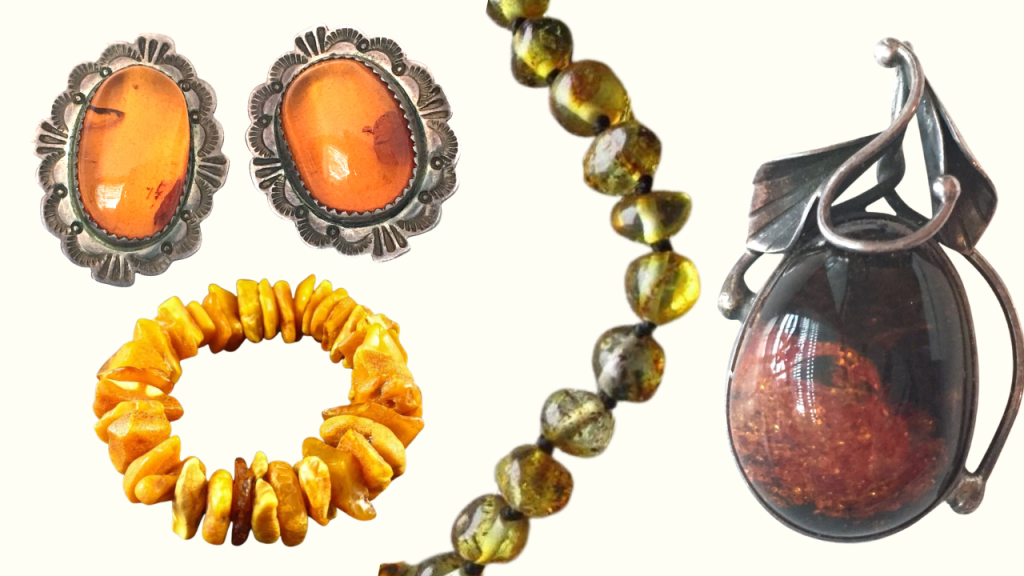
Amber is fossilized tree resin, and natural amber can contain internal characteristics such as inclusions, tiny particles, bubbles, or other irregularities.
That doesn’t mean every piece of amber will have obvious inclusions.
And here’s an important warning:
An interesting inclusion does not automatically prove that something is amber.
There are many imitations and other materials that can look surprisingly convincing.
That’s why I don’t rely on one visual characteristic alone.
Amber Comes in Many Different Colors
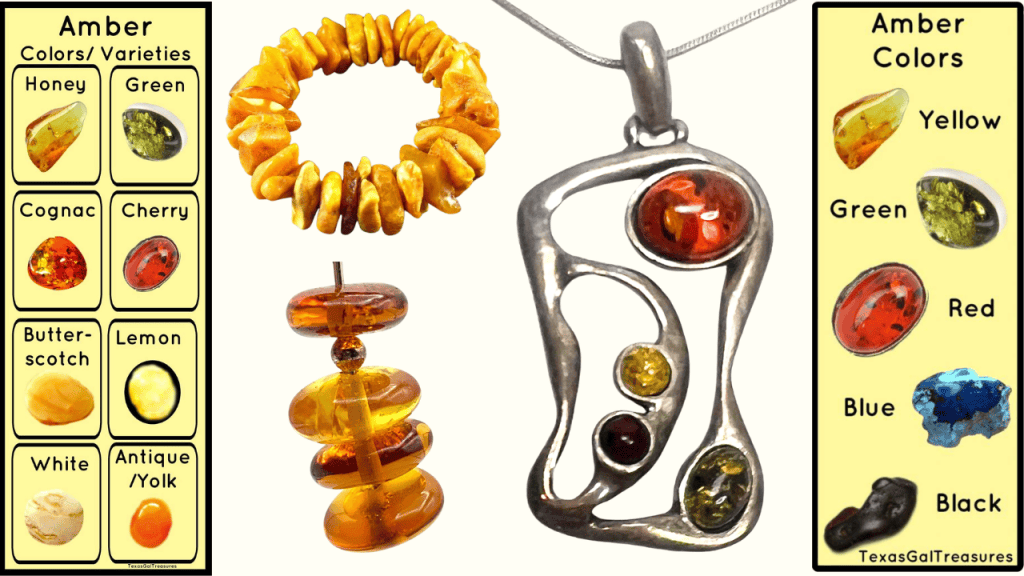
One of the things that makes amber so interesting—and sometimes so difficult to identify—is the incredible variety of colors it can have.
When most people hear the word amber, they picture a warm honey-gold color. That’s certainly one of the most recognizable varieties, but natural amber can occur in a much wider range of colors.
You may encounter amber in shades such as:
-
Honey or golden amber – The classic warm yellow, golden, or honey-colored amber that many people picture when they think of amber.
-
Butterscotch amber – A creamy, opaque amber that can range from pale yellow to a deeper caramel color.
-
Cognac amber – A rich orange-brown or reddish-brown variety with a warm, translucent appearance.
-
Cherry or red amber – Amber with noticeable reddish, cherry, or deep orange tones. Some pieces can be quite dark.
-
Yellow amber – Bright yellow to pale golden material, sometimes transparent and sometimes cloudy.
-
Cream or white amber – Pale, opaque amber that can look almost ivory, cream, or butterscotch.
-
Green amber – Amber with greenish tones. Some natural material can have subtle green coloration, while other green appearances can be the result of treatment or inclusions.
-
Blue amber – A particularly unusual variety associated primarily with the Dominican Republic. It can appear relatively ordinary in some lighting but show a striking blue fluorescence or blue appearance under certain conditions.
-
Black amber – Very dark amber that may appear black at first glance but can reveal reddish, brown, or other translucent tones when light passes through thinner areas.
There can also be considerable variation within a single piece. One bead may be translucent while another is cloudy or opaque, and the color can change depending on how thick the material is and how the light hits it.
Color Alone Doesn’t Prove It’s Amber
This is an important point when you’re identifying jewelry for resale.
A particular color does not automatically mean a piece is amber.
Plastic, resin, glass, shell, and other materials can imitate many of these colors remarkably well. In fact, some imitations are intentionally made to look like particular varieties of amber.
That’s why I don’t identify amber based on color alone.
Instead, I look at the color along with the material’s transparency, internal characteristics, surface, weight, construction, and other identifying clues.
Think of color as one piece of the puzzle—not the answer to the puzzle.
Look at the Surface
The surface can give you clues, too.
Ask yourself:
- Does the material have a glassy appearance?
- Does it have a layered or pearly appearance?
- Is there visible grain?
- Does the color appear completely uniform?
- Does the material look natural or manufactured?
None of these observations should be considered proof by themselves.
Instead, think of them as pieces of the puzzle.

The UV Test
Ultraviolet light is another test commonly used when examining amber.
Some amber fluoresces under UV light, often producing a yellowish, bluish, or greenish appearance depending on the material and conditions.
But here’s the important part:
UV fluorescence should be considered a clue—not a definitive identification test.
Different materials can fluoresce, and not every piece of amber will behave exactly the same way.
So if a mystery bead glows under UV, I don’t immediately announce, “It’s amber!”
I treat that result as one more piece of evidence.
The Saltwater Test
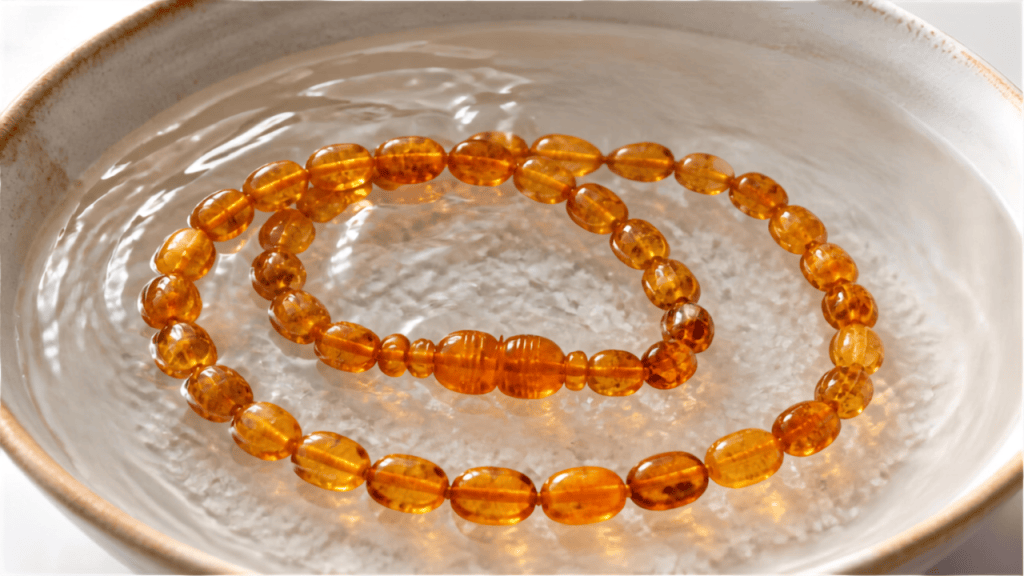
You’ll sometimes see the saltwater test recommended for amber identification.
The basic idea is that genuine amber can float in sufficiently concentrated salt water while many other materials sink.
The problem?
It’s not a perfect test.
The concentration of the solution matters, and other lightweight materials can potentially produce confusing results.
There’s also the practical issue of putting an unknown piece of jewelry into liquid.
If the jewelry contains metal components, finishes, adhesives, or other materials, I wouldn’t automatically assume that dunking the entire piece is a good idea.
For valuable or potentially collectible jewelry, non-destructive examination is preferable whenever possible.
Mystery Material #2: Shell or Mother of Pearl?
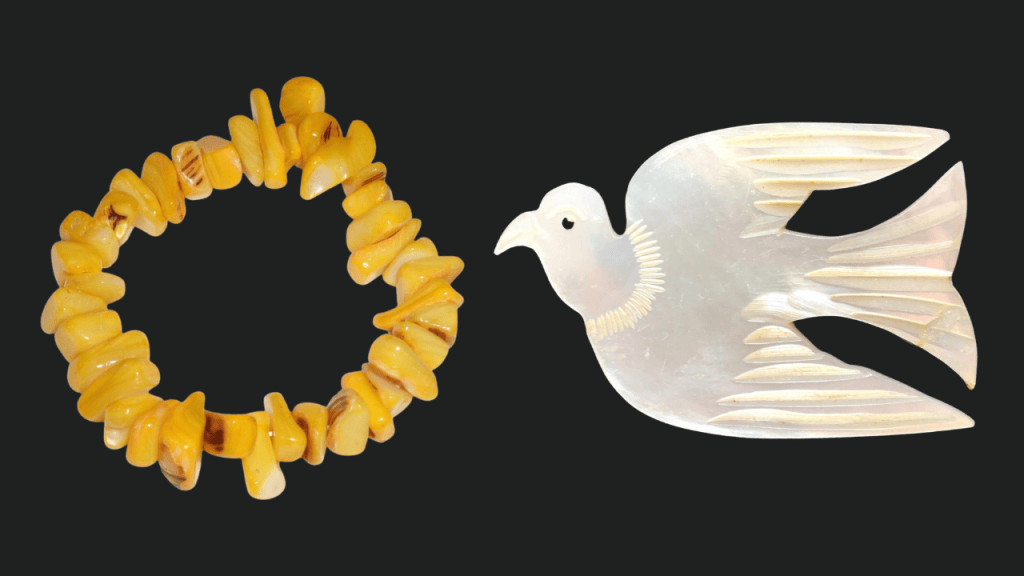
This one is especially interesting because mother of pearl is actually shell.
Mother of pearl, also called nacre, is the iridescent material that forms the inner layer of certain mollusk shells.
That’s what creates that beautiful shimmering effect you see in many jewelry pieces.
You may see mother of pearl used in:
- Earrings
- Pendants
- Brooches
- Rings
- Buttons
- Beads
- Inlay
- Watch components
- Decorative jewelry
What Does Mother of Pearl Look Like?
The easiest clue is often the characteristic iridescence.
When you move mother of pearl in the light, the surface can shift between different colors.
You might see:
- White
- Cream
- Pink
- Green
- Blue
- Silver
- Purple
- Rainbow-like flashes
The exact appearance depends on the shell and how it has been cut and finished.
But again, appearance alone isn’t always enough.
Some man-made materials are specifically designed to imitate the look of mother of pearl.
Mystery Material #3: Bone or Ivory?
What About Ivory?
This is where jewelry identification becomes much more serious.
Ivory can come from several animal sources, and laws governing ivory can be complicated. Regulations can vary depending on the species, location, age of the item, and whether you’re talking about possession, sale, importation, or exportation.
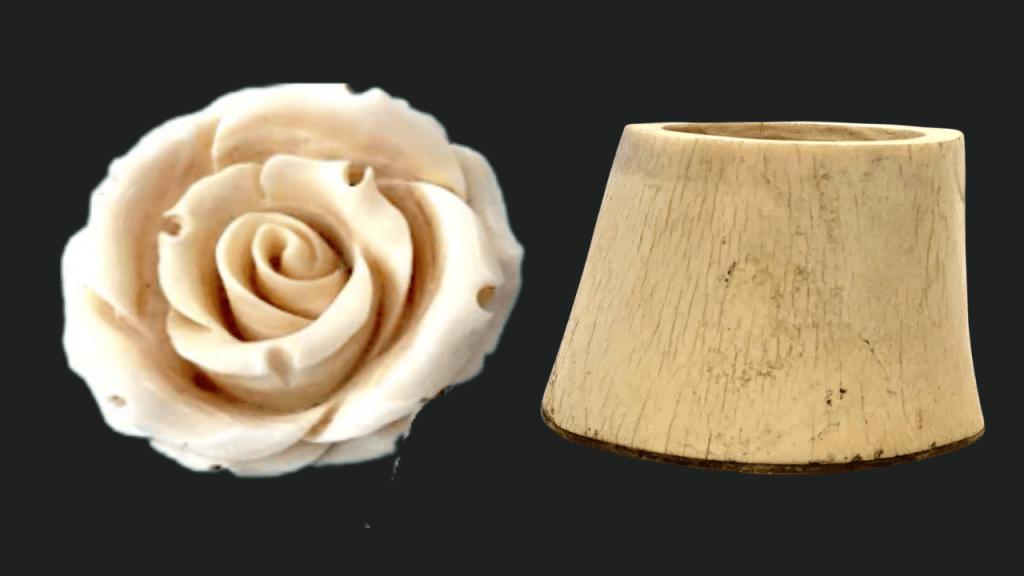
So I would never identify an unknown white or cream-colored jewelry component as ivory simply because it looks like ivory.
There are other materials that can resemble it, including:
- Bone
- Shell
- Certain plastics
- Resin
- Vegetable ivory
- Other substitutes
One Visual Clue: Grain
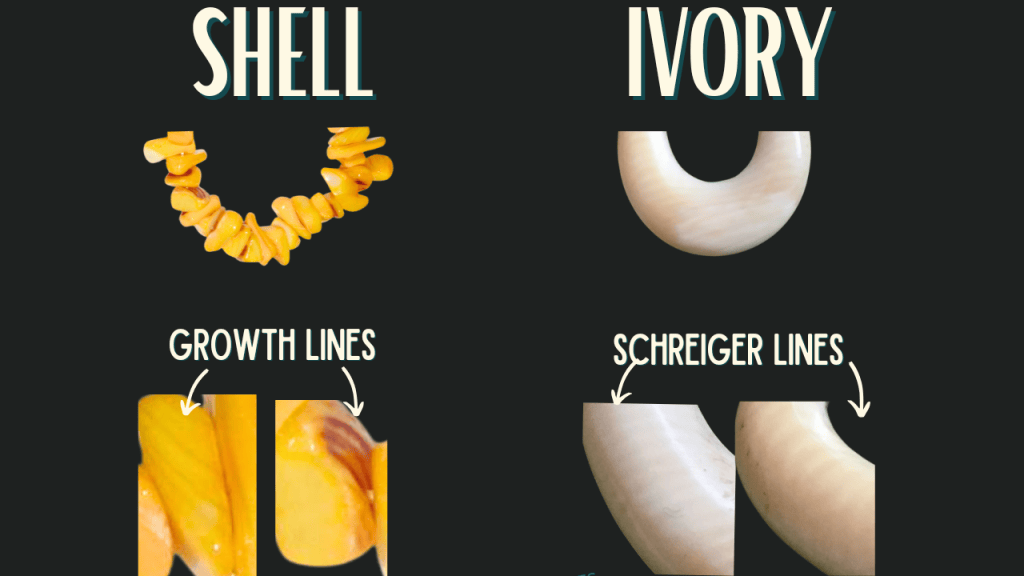
Natural ivory can display characteristic structural patterns.
One commonly discussed feature is a pattern sometimes called Schreger lines, which can appear as intersecting or cross-hatched lines when the material is viewed in an appropriate orientation.
But identifying ivory is not something I’d recommend doing from a quick photograph or one visual clue.
If you believe you have potentially significant ivory jewelry, professional identification and research into applicable laws are much safer than making an assumption.
And if you’re selling jewelry online, research different reselling platforms rules about selling ivory. Most, including Ebay and Etsy do not allow selling items containing ivory.

Mystery Material #4: Plastic
Could It Be Plastic?
Absolutely.
And this is one of the biggest traps in vintage jewelry identification.
Older plastics and resins can be surprisingly beautiful.
Some can imitate:
- Amber
- Coral
- Ivory
- Shell
- Tortoiseshell
- Jet
- Bakelite (a vintage plastic)
- Other natural materials
That’s why I never want to rely on the fact that something “looks old.”
A piece can look incredibly vintage and still be made from a synthetic material.
Likewise, something that looks inexpensive may turn out to be a much more interesting material than you expected.
My Process for Identifying Mystery Jewelry
When I come across an unidentified piece, I like to slow down instead of immediately deciding what it is.
Here’s the basic process I use:
Step 1: Examine the Entire Piece
Don’t focus only on the stone, bead, or mystery material.
Look at the entire piece.
Ask:
- How is it constructed?
- What type of clasp does it have?
- What metal is being used?
- Are there markings?
- Does the construction suggest a particular age?
- Does the material appear throughout the piece?
Sometimes the jewelry’s construction tells you more than the material itself.
Step 2: Look for Marks
Always check for identifying marks.
Look at:
- Clasps
- Backs of earrings
- Pendant backs
- Ring interiors
- Brooch backs
- Metal components
- Hidden areas
A tiny hallmark or manufacturer’s mark can completely change the direction of your research.
Step 3: Use Magnification
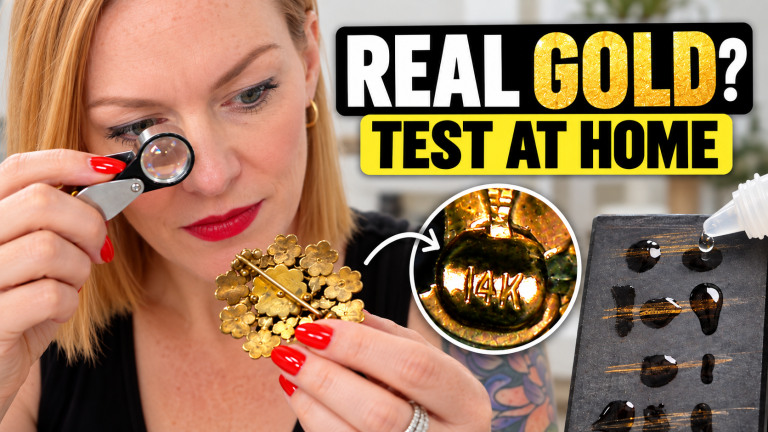
A good loupe is one of the most useful tools a jewelry reseller can own.
Magnification can reveal details you simply can’t see with your naked eye.
Look for:
- Grain
- Layering
- Inclusions
- Pores
- Surface wear
- Tool marks
- Manufacturing characteristics
- Construction details
If you don’t have a loupe yet, you are missing out on your best defense against buying fakes! This is a great jeweler’s loupe option. It’s inexpensive, fits right in your pocket or sourcing bag, and pays for itself the very first time it saves you from buying plastic disguised as amber!
Step 4: Compare It With Known Materials
If I’m trying to identify an unknown material, I like to compare it visually with pieces that I already know.
Seeing a mystery material beside a confirmed example can be much more helpful than looking at photographs online.
Step 5: Research the Construction
This is one of the most overlooked parts of jewelry identification.
Don’t research only the material.
Research the whole piece.
Look at:
- Design
- Construction
- Findings
- Clasp
- Chain
- Setting
- Bead shape
- Manufacturing style
- Possible era
Sometimes you can identify a piece based on the combination of these characteristics even when the material itself is difficult to determine.
What I Would NOT Do
There are plenty of jewelry-identification tests you’ll find online that I would approach very cautiously.
I don’t recommend experimenting with an unknown piece using methods that could:
- Scratch the surface
- Melt the material
- Burn it
- Damage the finish
- Damage adhesives
- Tarnish the metal
- Destroy collectible value
Especially when you’re dealing with vintage jewelry, a test that permanently damages the item isn’t necessarily worth the information it provides.
Whenever possible, start with non-destructive methods.
Examine it.
Magnify it.
Photograph it.
Research it.
Compare it.
Then decide whether you need additional testing.
How Identification Changes an eBay Listing
This is where jewelry identification becomes especially important for resellers.
Let’s say I have a strand of beautiful golden beads.
I could list it as:
“Vintage Amber Necklace”
But if I haven’t actually established that the beads are amber, that’s a risky description.
Instead, I might describe what I can confidently observe while continuing my research.
For example:
“Vintage Gold Tone Beaded Necklace – Material Unidentified”
That isn’t nearly as exciting as calling it amber.
But it’s honest.
And honest descriptions matter.
If further research gives me enough evidence to confidently identify the material, then I can update the listing accordingly.
When I am able to confirm the material, I will list the tests performed in the listing, and include a photo and/or video of the tests performed. This gives the buyer the assurance they are purchasing an authentic item, and it give me protection from buyers who might claim the item is mislabeled.
Don’t Forget the Jewelry Itself
Here’s another mistake I see people make when identifying jewelry:
They become so focused on the mystery material that they forget about the piece itself.
A necklace isn’t valuable solely because of what its beads are made from.
Other factors can matter enormously.
Consider:
Who made it?
How old is it?
Is it signed?
What is it made from?
How unusual is the design?
What condition is it in?
Is there a collector market for it?
What have comparable pieces actually sold for?
The material is only one piece of the puzzle.
The Fun Part of Jewelry Reselling
This is one of the reasons I love buying jewelry secondhand.
You can pick up a little bag of jewelry that someone else overlooked and suddenly find yourself asking:
What is this?
Then the research begins.
You examine it.
You look for marks.
You pull out the loupe.
You compare photographs.
You research the construction.
You check sold listings.
And sometimes you discover that the strange little piece you almost ignored is actually something pretty special.
Other times?
You discover that your “rare amber” is actually plastic.
And that’s okay, too.
Because the goal isn’t to make every mystery piece valuable.
The goal is to learn how to recognize what you’re actually holding.
Final Thoughts: When You Can’t Identify a Piece
If there’s one thing I want you to take away from this article, it’s this:
Don’t be afraid to say, “I don’t know yet.”
That’s actually a very useful answer when you’re identifying jewelry.
You don’t have to force an identification just because you need a listing title.
Start with what you can prove.
Look closely.
Research the construction.
Use magnification.
Compare it with known materials.
Document what you find.
And when necessary, get professional help.
The more jewelry you examine, the better you’ll become at recognizing the little clues that separate shell from amber, mother of pearl from imitation materials, and bone from other look-alikes.
And that’s when jewelry identification gets really fun.
Because every mystery piece becomes a little research project.
You never know what you’re going to find.